12.2 Batch Sample Import
|
|
|
|
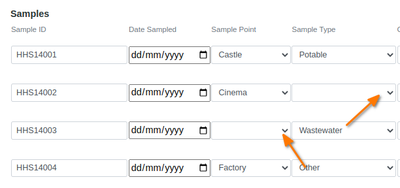
RevitalisedThe sample import fell by the way side in the code migration to Senaite, after it originated on Bika 2 circa 2008 Constant demand saw it resurrected as add-on, senaite.sampleimporter, without much modification in order to get it operational again. Ultimately the function has to be coded into the Batch creation UI and all CSV manipulation excluded Three step ImportWith the add-on installed, it is possible to import samples in bulk from a standardised CSV Using spreadsheets with lookups and data validation to prepare the CSVs for import, limits errors, but to take care of exceptions, the import is facilitated in 2 steps to allow error correction in the LIMS UI rather than in the CSV for reimportation 1. Upload The data in the CSV are read into the system and validated, referencing the values for Client and Contact, Sample Types, Analysis Profile etc. 2. Validate The data are displayed and the upload indicated as valid or not. Invalid data elements are highlighted and the user has the option to correct the entries on-screen. 3. Import Once all the invalid data have been corrected, if necessary, submitting it creates the Samples in the system, in a new Batch if not an existing one referenced in the import New or existing BatchesWhen an existing Batch is correctly identified in the CSV during the import, new Sample objects will be added to that batch. If not, the LIMS creates a new batch from the information included in the import's header |
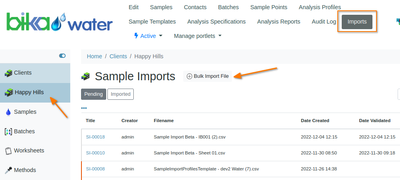
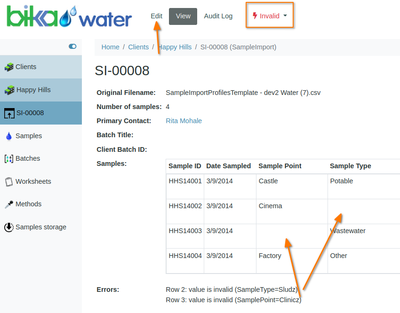
0. Prepare the CSV...With Google sheet example 1. Load the CSVNavigate to the Client's Imports folder and select their Imports tab: Client Sample Imports Listing Click [Bulk Import File], on the next screen browse to the CSV using the standard browser widget and click import. It takes seconds for the system to upload and validate the file entries 2. ValidateAfter loading the CSV, the new Import's page open, indicating whether it contains errors, Invalid or is OK, Valid |
There are 2 options to fix errors - they are reported very accurately
The Import's Edit page opens, and the correct values can be looked-up from lookups
 Fix the errors and click [Save]
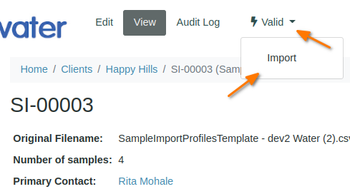
3. ImportOnce the Import is Valid, its Samples can be created from the upload. Click Import on the status drop down |


